Big Button - Part 15 - Organizing Code with Pub/Sub Messaging and Rust Modules
Table of Contents
- Introduction
- The Publisher-Subscriber (Pub/Sub) Design Pattern
- Rust Modules
- Making a Temporary Button for Development
- File Changes
- Let’s Give it a Shot!
Introduction
💻 HACKER In this part, we’ll focus on setting up a fitting code design pattern for our button. Software design patterns are general, reusable templates for solving common programming problems and achieving specific goals.

Design patterns help organize and simplify code, making it more logical, maintainable, scalable, extensible, and, perhaps most importantly, less of a headache to work with.
We have actually already implemented a behavioral design pattern in our program by using a finite state machine. That behavioral pattern is the State pattern, where the program’s flow depends on its internal state and some event.
In our embedded Rust program, we will also need a design pattern that helps loosely couple our code. That is, some parts of the program should not need to know what other parts are specifically doing. For example, some of our code should know that a button press event occurred, but not how it happened or how it was detected.
This kind of program architecture helps us follow the separation of concerns principle, making development cleaner, more modular, and easier to maintain.
The Publisher-Subscriber (Pub/Sub) Design Pattern
The Publisher-Subscriber (Pub/Sub) pattern is a messaging design pattern that enables decoupled communication between different parts of a program. In this pattern, publishers send messages to topics/channels without really knowing who (if anyone) will receive them, while subscribers listen to specific topics without knowing who is sending the messages.
NOTE
Conceptually the Publisher-Subscriber pattern is derived from a behavior pattern called The Observer (*dramatic music*). However, in our case, the Observer pattern is implemented as an in-process and brokerless concurrency messaging pattern within the Embassy embedded framework.
Because the typically used Pub/Sub newspaper analogy has been beaten into the ground, let’s try another analogy:
When a parent (publisher) yells out something important (like “Time for dinner!”), they don’t need to track down each child (subscriber) individually. They broadcast the message and let any interested child respond. The parent doesn’t really care what the children do with the information, and the children don’t really need to know why the parent said it. Both sides are completely independent.

Embassy Framework and Pub/Sub
Our Embassy framework implements Pub/Sub through its concurrency messaging pattern using lightweight in-memory channels. This isn’t a network-based distributed message broker system like MQTT, but rather:
- Local communication: All messaging happens within our single microcontroller firmware
- Zero network overhead: Communication occurs through shared memory with nanosecond latency
- Asynchronous and non-blocking: Tasks can publish and subscribe without blocking other operations
- No dynamic memory allocations: Uses compile-time allocated channels
- Power efficient: No busy-waiting or polling required
In our embedded application, we will use Embassy’s Pub/Sub implementation
for button event handling: PubSubChannel
The publisher will be the button monitoring task that detects physical button presses and publishes button press events. Any component interested in button press events (state machine, LED controller, buzzer, etc.) can subscribe and listen to the topic/channel.
This architecture allows us to easily add new features (like logging button presses or sending network requests) by simply adding new subscribers, without modifying the core button detection logic.
TIP
PubSubChannel is definitely not the only communication mechanisms that Embassy offers!
Feel free to explore other primitives:
Channel- Point-to-point communication between tasks. Only one consumer receives each message.PriorityChannel- Prioritized message queue where critical events are processed before normal events. Each message is received by only one consumer.Pipe- Streaming byte data between tasks. Ideal for serial protocols or data streams.Watch- State broadcasting where multiple receivers always get the latest value. Useful for sharing frequently-updated state.Mutex- Async mutual exclusion lock for protecting shared mutable data. Only one task can access the data at a time.RwLock- Read-write lock allowing multiple concurrent readers or a single exclusive writer.Semaphore- Counting semaphore for coordinating access to resources among multiple tasks.OnceLock- Initialize a value exactly once at runtime. Useful for lazy initialization of shared resources.AtomicU32- Atomic integer for sharing simple numeric values across tasks. Efficient for flags and counters.
Rust Modules
Imagine if all of your project code had to be included within a single directory, or even worse, one single file. Wouldn’t that be fun?! 😭
Rust modules are a way to organize and structure your code into logical, reusable pieces. Think of them as containers or folders that group related functionality together, making your code more organized and maintainable.
In our specific case, we want to group all code and files that are related to similar functionality (i.e., code for the button). This allows us to neatly separate and even potentially re-use/share our grouped module code.
Working with Rust modules you will have to become familiar with four things:
a file defining the module, mod, pub,
and use.
| Item | Definition | Example Usage |
|---|---|---|
<MODULE_NAME>/mod.rs | This file defines the module and its contents. It typically sits inside the module directory. | button/mod.rs |
mod | Declares and includes a module into your current scope/code | mod button; in the main.rs file to include and use the button module |
pub | Makes items accessible outside the module where they’re defined | pub fn my_function() { } lets other outside code call this function |
use | Imports an item into scope so you can use it without the full path | use button::my_function; then call my_function() directly |
A simple example of how to use these concepts can be found here.
We will use Rust modules for distinctly separate components, such as all code that handles button functionality.
Making a Temporary Button for Development
💻 MAKER By the end of this part we will have code that works with a button press input. This means that in order to test and troubleshoot our current code, we need some way to electrically generate a button input event.
To achieve this, instead of buying that giant red button now, we will simply touch two stripped wires together.
-
Take the 26 AWG wire suggested in the previous part and cut two 4-inch long pieces.
-
Strip about 0.25 to 0.5 inches off each end of the wire pieces
-
Insert and fasten each wire into the development board. Connect one wire into
GP15and the other wire into any openGNDterminal.
Once the two wire pieces are connected, your set up should look something like the following.
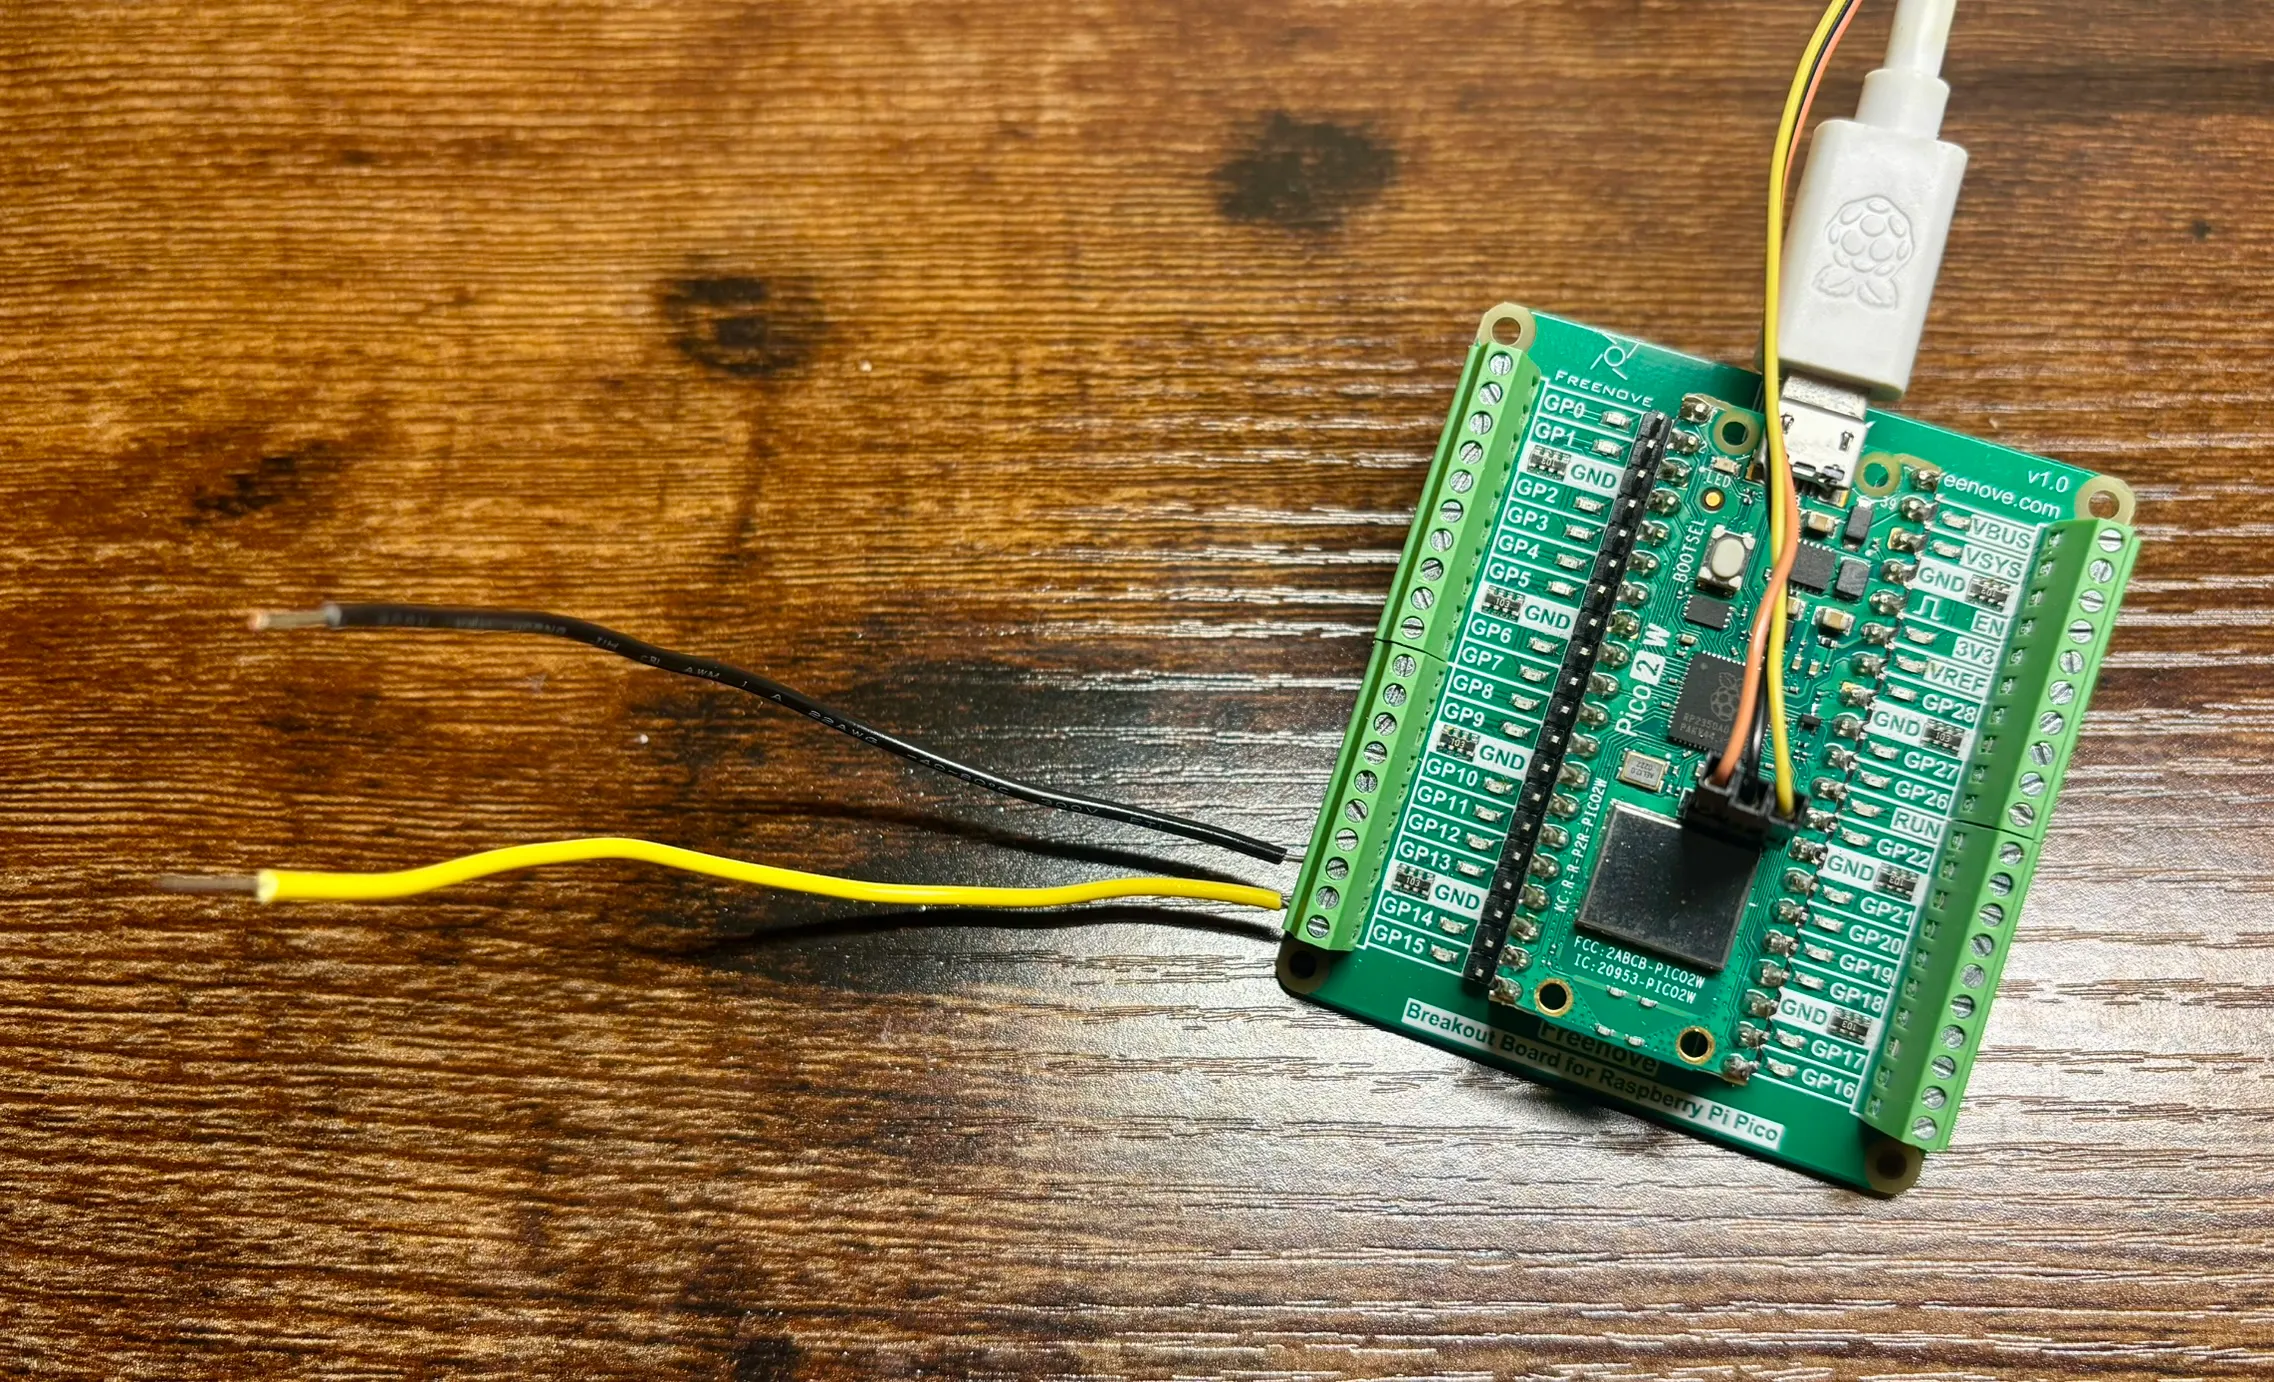
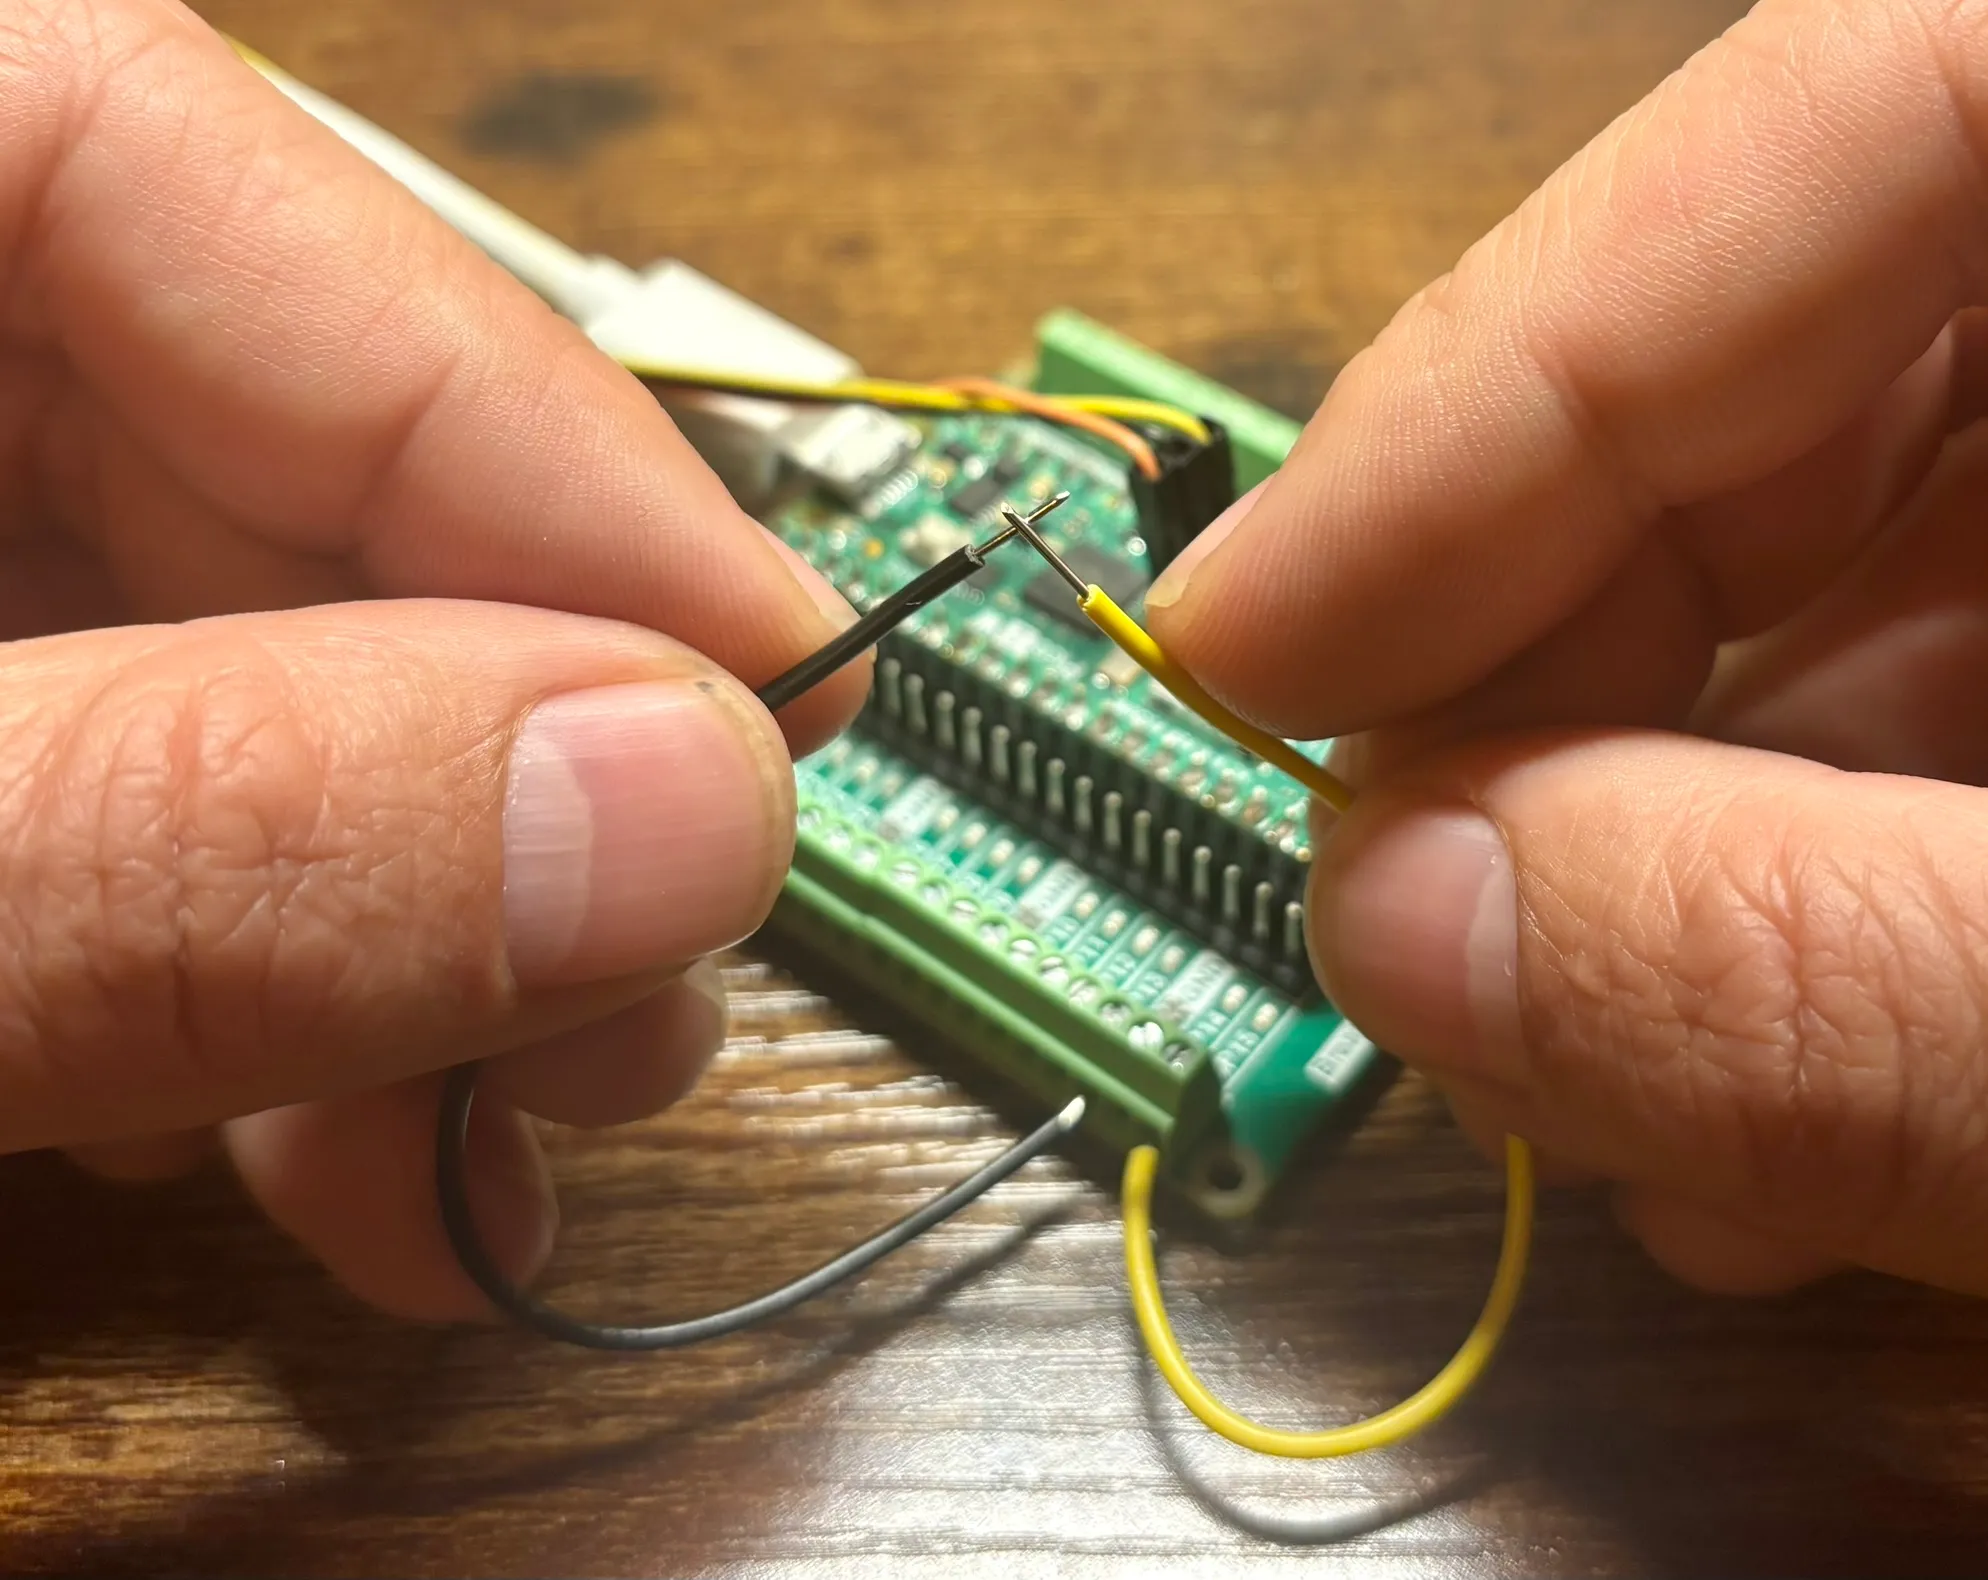
Then when you want to simulate a “button press”, simply touch the two wires together.
Don’t worry, we will get to connect and build all the cool hardware in subsequent parts. Now, our main concern is developing the Rust code for our project.
File Changes
For a quick indicator of what files we will add or change in this part,
expand the following file tree. Here we are only showing the src
project directory.
Note that we are adding an entire directory for anything related to the button and button press. This will keep code structure clearer and more organized.
10 collapsed lines
src├── button│ ├── consumer_loop.rs # <--- New│ ├── core.rs # <--- New│ ├── messaging.rs # <--- New│ └── mod.rs # <--- New├── clocks_config.rs├── main.rs # <--- Changes├── state_machine.rs└── utility.rsbutton/messaging.rs
First, let’s define the logic that will be critical to our Publisher-Subscriber pattern. Here we will be defining anything that is involved in our messaging.
Although it would be easy to just have one kind of button press type, we are
anticipating a variety of different press types (i.e., short press, long press, hold).
For now, let’s define a PressType enum with one single press type: RegularPress.
//! Button module - Messaging - Pub-Sub
#![allow(dead_code)] // only used for development
use embassy_sync::blocking_mutex::raw::ThreadModeRawMutex; // Ensure thread-safety across tasksuse embassy_sync::pubsub::PubSubChannel;use embassy_time::Instant;
/// Button press type#[derive(Debug, Copy, Clone, PartialEq)]pub enum PressType { /// Regular button press type RegularPress,}We will next define the message structure that is passed by the publisher into the Pub/Sub channel. This message should be specific to the button press and tell us some useful information about the button press event.
/// Button pub-sub message item definition/structure that is passed via channel#[derive(Debug, Copy, Clone)]pub struct ButtonMessage { /// Button ID pub id: u8, /// Timestamp of button press start pub timestamp_start: Instant, /// Timestamp of button press end pub timestamp_end: Instant, /// The type of button press pub press_type: PressType,}This button press message structure is defined in ButtonMessage and contains things
like button press timing and the button press type. We are also including the id
in case there are other buttons that are pressed.
Lastly, let’s define our Pub/Sub topic/channel with PubSubChannel.
This is the conduit, or pipe, into which the message is fed by a publisher,
and from which subscribers read these messages.
/// Button pub-sub topic channel/// Other program parts can listen to this topic to get button press events/// 2 total capacity/messages, 3 subscribers, and 1 publisherpub static BUTTON_PUBSUB_CHANNEL: PubSubChannel<ThreadModeRawMutex, ButtonMessage, 2, 3, 1> = PubSubChannel::new();A few things to note in this channel definition:
- Given our embedded
no-stdnature of the program, we must define: how many messages can this channel hold, how many subscribers can read from this channel, and how many publishers can post to this channel ThreadModeRawMutexensures our publisher and subscribers can safely share the channel without stepping on each other’s toes (race conditions).
button/core.rs
Now we will add the main logic for the button functionality. This file will contain everything that the button actually does. In this part we only are going to add the fundamental and basic code to it, however in later parts we will add more code.
NOTE
This file is named “core” because it holds the central code for this module. To stay consistent, other modules that we will add will have the same naming.
Although there are relatively many additions to this file, we will step-by-step define and explain this code.
To make this code less verbose and more understandable,
let’s introduce a few Rust type aliases.
Type aliases define a new name for an existing type. For example, here we
are defining our ItemId, ItemHandle, and ItemInfo.
//! Button module
use defmt::*;use defmt_rtt as _;use panic_probe as _;
use embassy_rp::gpio::Input;use embassy_sync::blocking_mutex::raw::ThreadModeRawMutex; // Ensure thread-safety across tasksuse embassy_sync::pubsub::{Error, Publisher};use embassy_time::Instant;use embassy_time::Timer;
use super::{BUTTON_PUBSUB_CHANNEL, ButtonMessage, PressType};
// Custom type aliasestype ItemId = u8;type ItemHandle = Input<'static>;type ItemInfo = [(ItemId, ItemHandle); 1];The Button Struct
Next, we will define our Button struct which will manage our button hardware. The struct holds two key properties:
item_info: An array of button definitions, where each button has an ID and its GPIO input handlebutton_pubsub_publisher: A publisher that will send button events through our pub-sub channel
The constructor takes our button definitions and creates a publisher from the global channel we defined earlier. This publisher will allow us to broadcast button press events to any subscribers listening on the channel. Notice that our publisher matches our previously defined pub/sub definition of 2 total messages, 3 subscribers, and 1 publisher.
/// Handle for individual Buttons - Button has all provisioned buttons definedpub struct Button<'a> { /// Button definitions - `[(<BUTTON ID>, <`[Input]` HANDLE>), ...]` pub item_info: ItemInfo, /// Button pub-sub publisher for message publishing pub button_pubsub_publisher: Publisher<'a, ThreadModeRawMutex, ButtonMessage, 2, 3, 1>,}Now let’s add some helper methods to our Button implementation. These utility functions will
make working with buttons more convenient:
-
get_ids(): Extracts all button IDs from our button definitions into an array. This is useful when we need to know which buttons are available. -
check_ids(): Validates whether given button IDs actually exist in our configuration. This prevents us from trying to monitor non-existent buttons.
These helper methods establish a pattern we’ll use throughout: always validate inputs before performing operations. This defensive programming approach is especially important in embedded systems where runtime errors can be difficult to debug.
impl<'a> Button<'a> { /// Constructor /// /// * `item_info` - Button definitions pub fn new(item_info: ItemInfo) -> Result<Self, Error> { let button_pubsub_publisher = BUTTON_PUBSUB_CHANNEL.publisher()?; Ok(Self { item_info, button_pubsub_publisher, }) }
/// Get all IDs pub fn get_ids(&self) -> [u8; 1] { let mut ids = [0; 1]; for (index, (id, _)) in self.item_info.iter().enumerate() { ids[index] = *id; } ids }
/// Check if specified IDs are valid and within the pre-defined item info /// /// * `ids` - Item IDs to check. Empty ids array will return `true` pub async fn check_ids(&self, ids: &[u8]) -> bool { if ids.is_empty() { return true; } for id in ids.iter() { if !self.get_ids().contains(id) { return false; } } true }}Finally, we implement the Format trait from the defmt crate.
This trait enables our Button struct to be printed using defmt::info!, defmt::debug!,
and similar logging macros.
The implementation creates a human-readable representation showing all configured button IDs.
For example, if we have buttons with IDs 1 and 2, it would format as: Button { Buttons: {ID: 1} {ID: 2} }.
This formatting capability is invaluable during development and debugging.
/// Implement the `Format` trait for debugging/// This allows us to print the struct with `defmt::info!` and friendsimpl<'a> Format for Button<'a> { fn format(&self, f: defmt::Formatter) { defmt::write!(f, "Button {{"); defmt::write!(f, " Buttons: "); for (id, _) in self.item_info.iter() { defmt::write!(f, "{{ID: {}}} ", id); } defmt::write!(f, "}}"); }}Debouncing a Button Press
When you press a physical button, it doesn’t create a clean transition from HIGH to LOW (or vice versa). Instead, the electrical contacts inside the button physically bounce against each other for a few milliseconds, creating multiple rapid transitions. This “bouncing” can cause a single button press to be interpreted as multiple presses by our microcontroller.
Debouncing solves this by waiting for the signal to stabilize before accepting it as a valid state change.
You might notice that debounce_high_to_low() and debounce_low_to_high() are nearly identical.
We could combine them into a single function with a parameter to specify the direction,
but for this tutorial, we’re keeping them separate for two reasons: clarity and understanding.
impl<'a> Button<'a> {
....
/// Debouncing button press - GPIO Level HIGH to LOW /// Debouncing is the process of removing noise from a button press signal. /// Returns when the button press signal is stable. /// /// * `id` - Button ID number async fn debounce_high_to_low(&mut self, id: u8) { let item = self.item_info.iter_mut().find(|(button_id, _)| *button_id == id);
if let Some((_, handle)) = item { loop { let pin_level_1 = handle.get_level(); handle.wait_for_low().await; Timer::after_millis(20).await; let pin_level_2 = handle.get_level(); if pin_level_1 != pin_level_2 && handle.is_low() { break; } } } else { warn!("Button with ID {} not found", id); } }
/// Debouncing button press - GPIO Level LOW to HIGH /// Debouncing is the process of removing noise from a button press signal. /// Returns when the button press signal is stable. /// /// * `id` - Button ID number async fn debounce_low_to_high(&mut self, id: u8) { let item = self.item_info.iter_mut().find(|(button_id, _)| *button_id == id);
if let Some((_, handle)) = item { loop { let pin_level_1 = handle.get_level(); handle.wait_for_high().await; Timer::after_millis(20).await; let pin_level_2 = handle.get_level(); if pin_level_1 != pin_level_2 && handle.is_high() { break; } } } else { warn!("Button with ID {} not found", id); } }}Button Press Monitoring Loop
Now we come to the heart of our button module, the monitor_press() function.
This is where everything comes together to create a complete button monitoring system.
This function runs a continuous loop in an async task, watching a specific button for
press events.
One thing to point out here is the event publishing mechanism.
When a complete button press cycle occurs (press down and release), we create a ButtonMessage
containing all the relevant information. This message is then published through our
pub-sub channel using button_pubsub_publisher.publish().
impl<'a> Button<'a> {
....
/// Continuously watch specified button edge state and report button press. /// /// * `id` - Button ID number pub async fn monitor_press(&mut self, id: u8) -> () { if !self.check_ids(&[id]).await { error!("Failed to find specified Button ID in the pre-defined Button info"); return; }
let mut button_down_press_timestamp: Instant; let mut button_up_release_timestamp: Instant;
loop { // Wait for button down press self.debounce_high_to_low(id).await;
button_down_press_timestamp = Instant::now(); info!( "Button ID {} down pressed! - Timestamp: {:?}ms", id, button_down_press_timestamp.as_millis() );
// Wait for button up release self.debounce_low_to_high(id).await; button_up_release_timestamp = Instant::now(); let release_time = button_up_release_timestamp.duration_since(button_down_press_timestamp); info!( "Button ID {} up released! - Timestamp: {:?}ms -> Time Difference: {:?}ms", id, button_up_release_timestamp.as_millis(), release_time.as_millis(), );
// Publish the button press event message to channel self.button_pubsub_publisher .publish(ButtonMessage { id, timestamp_start: button_down_press_timestamp, timestamp_end: button_up_release_timestamp, press_type: PressType::RegularPress, }) .await; } }}button/consumer_loop.rs
We will need a separate concurrent non-blocking async task whose sole purpose is simply
to monitor the button press. All we are doing here is initializing/creating our Button struct,
and calling its monitor_press() method with button ID 0. Remember, the monitor_press()
method has an infinite loop within it.
//! Button module - Task manager module
use defmt::*;use defmt_rtt as _;use panic_probe as _;
use embassy_rp::gpio::Input;
use super::Button;
/// Async task - Button/// Continuously monitor and report button press/release events////// * `button_info` - Button information vector#[embassy_executor::task]pub async fn start_button_monitor(button_info: [(u8, Input<'static>); 1]) { info!("Running Button monitor async task ..."); let mut button = Button::new(button_info).unwrap();
button.monitor_press(0).await;}Note that this start_button_monitor() async task that we just defined will be called and spawned
from our main.rs file.
button/mod.rs
Remember that whole Rust module section above? Well, this is where it comes into play.
We will tie all of our button files into a Rust module within a new button/ directory.
After creating the button module directory, let’s add a mod.rs file within it.
Within that file, add the following code.
//! Button module - Module definition - Responsible for handling system buttons
// Map all parts of this modulemod consumer_loop;mod core;mod messaging;
// Public re-export of specifics that are available outside of modulepub use consumer_loop::start_button_monitor;pub use core::Button;pub use messaging::{BUTTON_PUBSUB_CHANNEL, ButtonMessage, PressType};Here’s what we’re doing: we’re declaring all the sub-modules (like core and messaging)
that make up the button module using the mod keyword.
We use use to import items from the sub-modules into this scope. Then, we prepend pub
to make those items publicly accessible outside the module. Anything not explicitly
re-exported with pub use remains private and cannot be used outside of this button module.
main.rs
Now that all the pieces are in place, let’s use the button module and wire everything up
in main.rs. We’ll create a button on GPIO pin 15, spawn
it as an async task, and let it run alongside our state machine.
First, we will use use to include/import our new button module. This will allow us
to start our async task start_button_monitor() that is defined in button/consumer_loop.rs.
In order to define our button, we need to know what physical Input
PIN it’s connected to
on our microcontroller, and also what Pull
configuration it uses (pull-up or pull-down).
So effectively, our button definition tuple that we are passing to define our Button struct
is this: [(<BUTTON_ID>, <PIN_INPUT>, <PULL_CONFIG), ...];
8 collapsed lines
#![no_std]#![no_main]#![allow(unused_variables)] // only used for development#![allow(unused_imports)] // only used for development
use defmt::*;use defmt_rtt as _;use panic_probe as _;
use embassy_executor::Spawner;use embassy_rp::config::Config as HalConfig;use embassy_rp::gpio::{Input, Pull};use embassy_time::Timer;
mod clocks_config;use clocks_config::ClockSettings;mod button;mod state_machine;mod utility;
9 collapsed lines
// Loading configurations// Note: This comes from the 'configs.rs' file created in 'build.rs' from 'configs.json'// Note: All loaded configurations will be UPPERCASE string slice (&str) constantsinclude!(concat!(env!("OUT_DIR"), "/configs.rs"));
// Loading obfuscated secrets (XOR_KEY and _OBFUSCATED constants)// Note: Similar considerations as configurations// Note: Load via utility.deobfuscate()include!(concat!(env!("OUT_DIR"), "/secrets.rs"));
#[embassy_executor::main]async fn main(spawner: Spawner) {22 collapsed lines
info!("=================================="); info!(" Package: {} v{}", env!("CARGO_PKG_NAME"), env!("CARGO_PKG_VERSION")); info!("==================================");
// Apply default clock configuration let mut hal_configuration = HalConfig::default();
info!("Configuring all system clocks ..."); let clock_settings = ClockSettings { xosc_crystal_hz: 12_000_000, // RP2350 uses 12MHz crystal system_frequency_mhz: CLOCK_SYSTEM_FREQUENCY_MHZ.parse::<u32>().unwrap(), usb_frequency_mhz: CLOCK_USB_FREQUENCY_MHZ.parse::<u32>().unwrap(), peripheral_clock_divider: CLOCK_PERIPHERAL_DIVIDER.parse::<u8>().unwrap(), adc_frequency_mhz: CLOCK_ADC_FREQUENCY_MHZ.parse::<u32>().unwrap(), reference_clock_divider: CLOCK_REFERENCE_DIVIDER.parse::<u8>().unwrap(), }; clocks_config::configure_all_clocks(&mut hal_configuration, clock_settings); let peripherals = embassy_rp::init(hal_configuration);
// Log and verify system clock frequencies clocks_config::print_device_frequencies(); clocks_config::verify_clock_with_timer(500).await;
// Button - Define and spawn async task let button_info = [(0_u8, Input::new(peripherals.PIN_15, Pull::Up))]; spawner .spawn(button::start_button_monitor(button_info)) .expect("Failed spawning button_consumer");
// Spawn state machine async task spawner .spawn(state_machine::state_machine_task()) .expect("Failed spawning state machine");
info!("All Set! Running async loop ...");
// General async loop to ensure entire program runs forever while // asynchronously working on other tasks loop { Timer::after_secs(5).await; }}Let’s Give it a Shot!
As always, in our terminal run the following command to compile our Rust code, send to the microcontroller, and run it.
cargo run --releaseLet’s touch the two wires together… ummm, I mean press a button!
.... Compiling big-button v0.1.0 (/home/you/projects/big-button) Finished `release` profile [optimized + debuginfo] target(s) in 0.77s Running `probe-rs run --chip=RP235x --log-format '[{t}] {[{L}]%dimmed%bold} {{f:dimmed}:{l:dimmed}%30}: {s}' target/thumbv8m.main-none-eabihf/release/big-button` Erasing ✔ 100% [####################] 12.00 KiB @ 52.50 KiB/s (took 0s) Finished in 1.06s[0.000510] [INFO ] main.rs:33 : ==================================[0.000539] [INFO ] main.rs:34 : Package: big-button v0.1.0[0.000594] [INFO ] main.rs:35 : ==================================19 collapsed lines
[0.000611] [INFO ] main.rs:40 : Configuring all system clocks ...[0.000633] [DEBUG] clocks_config.rs:44 : PLL Config: 133 MHz -> refdiv=1, fbdiv=133, post_div1=6, post_div2=2[0.000678] [DEBUG] clocks_config.rs:44 : PLL Config: 48 MHz -> refdiv=1, fbdiv=120, post_div1=6, post_div2=5[0.000553] [DEBUG] clocks_config.rs:151 : Log Device Clock Frequencies:[0.000564] [DEBUG] clocks_config.rs:152 : [Oscillators][0.000575] [DEBUG] clocks_config.rs:153 : - ROSC (Ring Oscillator): 6500000 Hz[0.000597] [DEBUG] clocks_config.rs:154 : - XOSC (Crystal Oscillator): 12000000 Hz[0.000616] [DEBUG] clocks_config.rs:156 : [PLLs (Phase-Locked Loops)][0.000627] [DEBUG] clocks_config.rs:157 : - SYS PLL: 133000000 Hz[0.000650] [DEBUG] clocks_config.rs:158 : - USB PLL: 48000000 Hz[0.000670] [DEBUG] clocks_config.rs:160 : [System Clocks][0.000683] [DEBUG] clocks_config.rs:161 : - SYS CLK (System Clock): 133000000 Hz[0.000707] [DEBUG] clocks_config.rs:162 : - REF CLK (Reference Clock): 12000000 Hz[0.000726] [DEBUG] clocks_config.rs:163 : - PERI CLK (Peripheral Clock): 133000000 Hz[0.000747] [DEBUG] clocks_config.rs:165 : [Specialized Clocks][0.000759] [DEBUG] clocks_config.rs:166 : - USB CLK (USB Clock): 48000000 Hz[0.000780] [DEBUG] clocks_config.rs:167 : - ADC CLK (ADC Clock): 48000000 Hz[0.500830] [DEBUG] clocks_config.rs:131 : [System clock frequency test] Actual: 500000 microseconds -> Measured: 500022 microseconds[0.500873] [DEBUG] clocks_config.rs:143 : [System clock frequency test] Clock accuracy: 0.00% off[0.500936] [INFO ] main.rs:71 : All Set! Running async loop ...[0.500955] [INFO ] state_machine.rs:113 : Running State Machine async task ...[0.500974] [INFO ] state_machine.rs:63 : [State: Startup - Event: PowerOn][0.501003] [INFO ] consumer_loop.rs:17 : Running Button monitor async task ...[3.820456] [INFO ] core.rs:137 : Button ID 0 down pressed! - Timestamp: 3820ms[3.966900] [INFO ] core.rs:147 : Button ID 0 up released! - Timestamp: 3966ms -> Time Difference: 146ms[8.958494] [INFO ] core.rs:137 : Button ID 0 down pressed! - Timestamp: 8958ms[11.69075] [INFO ] core.rs:147 : Button ID 0 up released! - Timestamp: 11690ms -> Time Difference: 2732msThe logs show timestamps of the button down and button up events, and also
the duration of the entire press.
Here I touched the two “button” wires together one time quickly (short press - 146ms) and one time
held together for a little while (long press - 2732ms).
Boom! How cool is that!?
If everything is good, git commit your changes and push to GitHub.com.
You know … things probably will just get better from here on …
No spam. Unsubscribe any time.